-
Tool Hire
Access & Powered Access Breaking & Drilling Building & Siteworks Carpet Cleaners Cleaning & Floorcare Concreting & Preparation Cooling, Heating, Drying Event Fixing Tools Gardening Ladders Lifting & Handling Lighting & Power Painting & Decorating Plumbing & Pumping Powered Access Safety & Ventilation Sanders Sawing & Cutting Skip Hire Surveying & Location Welding Hilti Products
- Find a Branch
- Tips & Advice
- FAQ
- Contact Us
Home How to maintain the garden
Throughout the year, your garden will require consistent maintenance to remain looking in top condition. Hedges, bushes, trees and lawns will all require some DIY treatment, so get to work and get gardening.
Trimming Hedges
Step 1
Hedges often have the habit of growing out of control quickly if left to their own devices, so regular trimming is essential. First check for any obstacles or fencing that may get caught in your machinery or cause interference. You can also use an RCD plug as an additional security measure, to reduce the chance of an electrical shock.
Step 2
Get a solid footing when using the strimmer, non slip boots are ideal in this situation. Hold the trimmer firmly with both hands, far enough away from your body to prevent any mishaps.
Step 3
Working from the ground upwards, sweep the trimmer over the hedge to cut to branches to the desired shape. Cut away from your body so that any sharp branches do not fall on you. It will usually be possible to compost these leaves and branches after you are finished, which can be fed back into the garden as new soil.
Step 4
Trimmers may struggle to cut any material that is too thick, so avoid thick branches and tree trunks unless you have a chainsaw or manual saw to hand.
Chipping and shredding
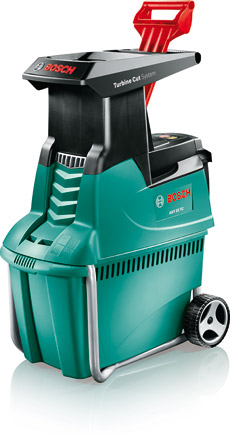
Ensure the shredder is securely positioned on a flat surface before use and placed away from anything that could be damaged by flying debris. As a safety precaution, be sure to wear safety goggles to protect your eyes.
Step 1
Do not over fill the shredder, which could cause the machine to jam. Instead, feed the material through the machine one piece at a time for maximum cutting efficiency.
Step 2
Following the advice in the HSS Safety Operating and Safety guide, place a tough sack underneath the shredder outlet chute to catch all of the flying debris. This can later be used as mulch in your compost, which is great for putting back into your soil.
Step 3
For smaller branches and garden waste, feed this into the large hopper one piece at a time to prevent jamming and damaging of the machine.
Step 4
Empty all the collected waste into your collection bucket and recycle any green waste back into your garden or compost heap.
Footing for fences
Step 1
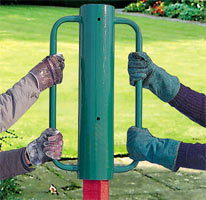
Fences are a great way to create privacy in your garden, or even for keeping wildlife at bay. With a little effort, erecting a quality looking fence system should not be a problem. By digging quality post-holes, you can ensure the fence will be standing strong for years to come.
Step 2
To erect a fence on soft ground, you will need a post hole borer to remove the necessary earth for the fence posts. This petrol driven version makes light work of the ground, for a quick, well dug post hole.
Step 3
Position the auger (the post hole machine head) where you wish to dig the hole and begin to increase the engine revs. Keeping the auger vertical, lower the machine towards the ground slowly, this will start to remove the soil. You may need to remove the auger periodically from the hole to remove the additional debris.
Step 4
When you have dug to your desired depth, withdraw the auger from the ground, allowing it to rotate until it becomes clear of the soil. You can clear out the remaining soil with a shovel if the auger does not fully remove the debris.


